How to check DPI in Figma before printing
Low-resolution images can look fine on screen and still fail in print. Printery checks effective DPI at your print size, flags low-res assets, and helps you keep every image at 300 DPI where it matters.
What Is DPI and Why Does It Matter?
DPI (Dots Per Inch) measures how many ink dots fit in one inch of printed output. Higher DPI means more detail and sharper images.
Screens display at 72-96 PPI, but commercial printing requires 300 DPI for crisp, professional results. Using screen-resolution images in print results in visible pixelation.
DPI Guidelines
- ✓ 300 DPI: Commercial printing (standard)
- ✓ 150 DPI: Large format / viewing from distance
- ⚠ 72-96 DPI: Screen only — NOT for print
- ✗ <72 DPI: Will look terrible printed
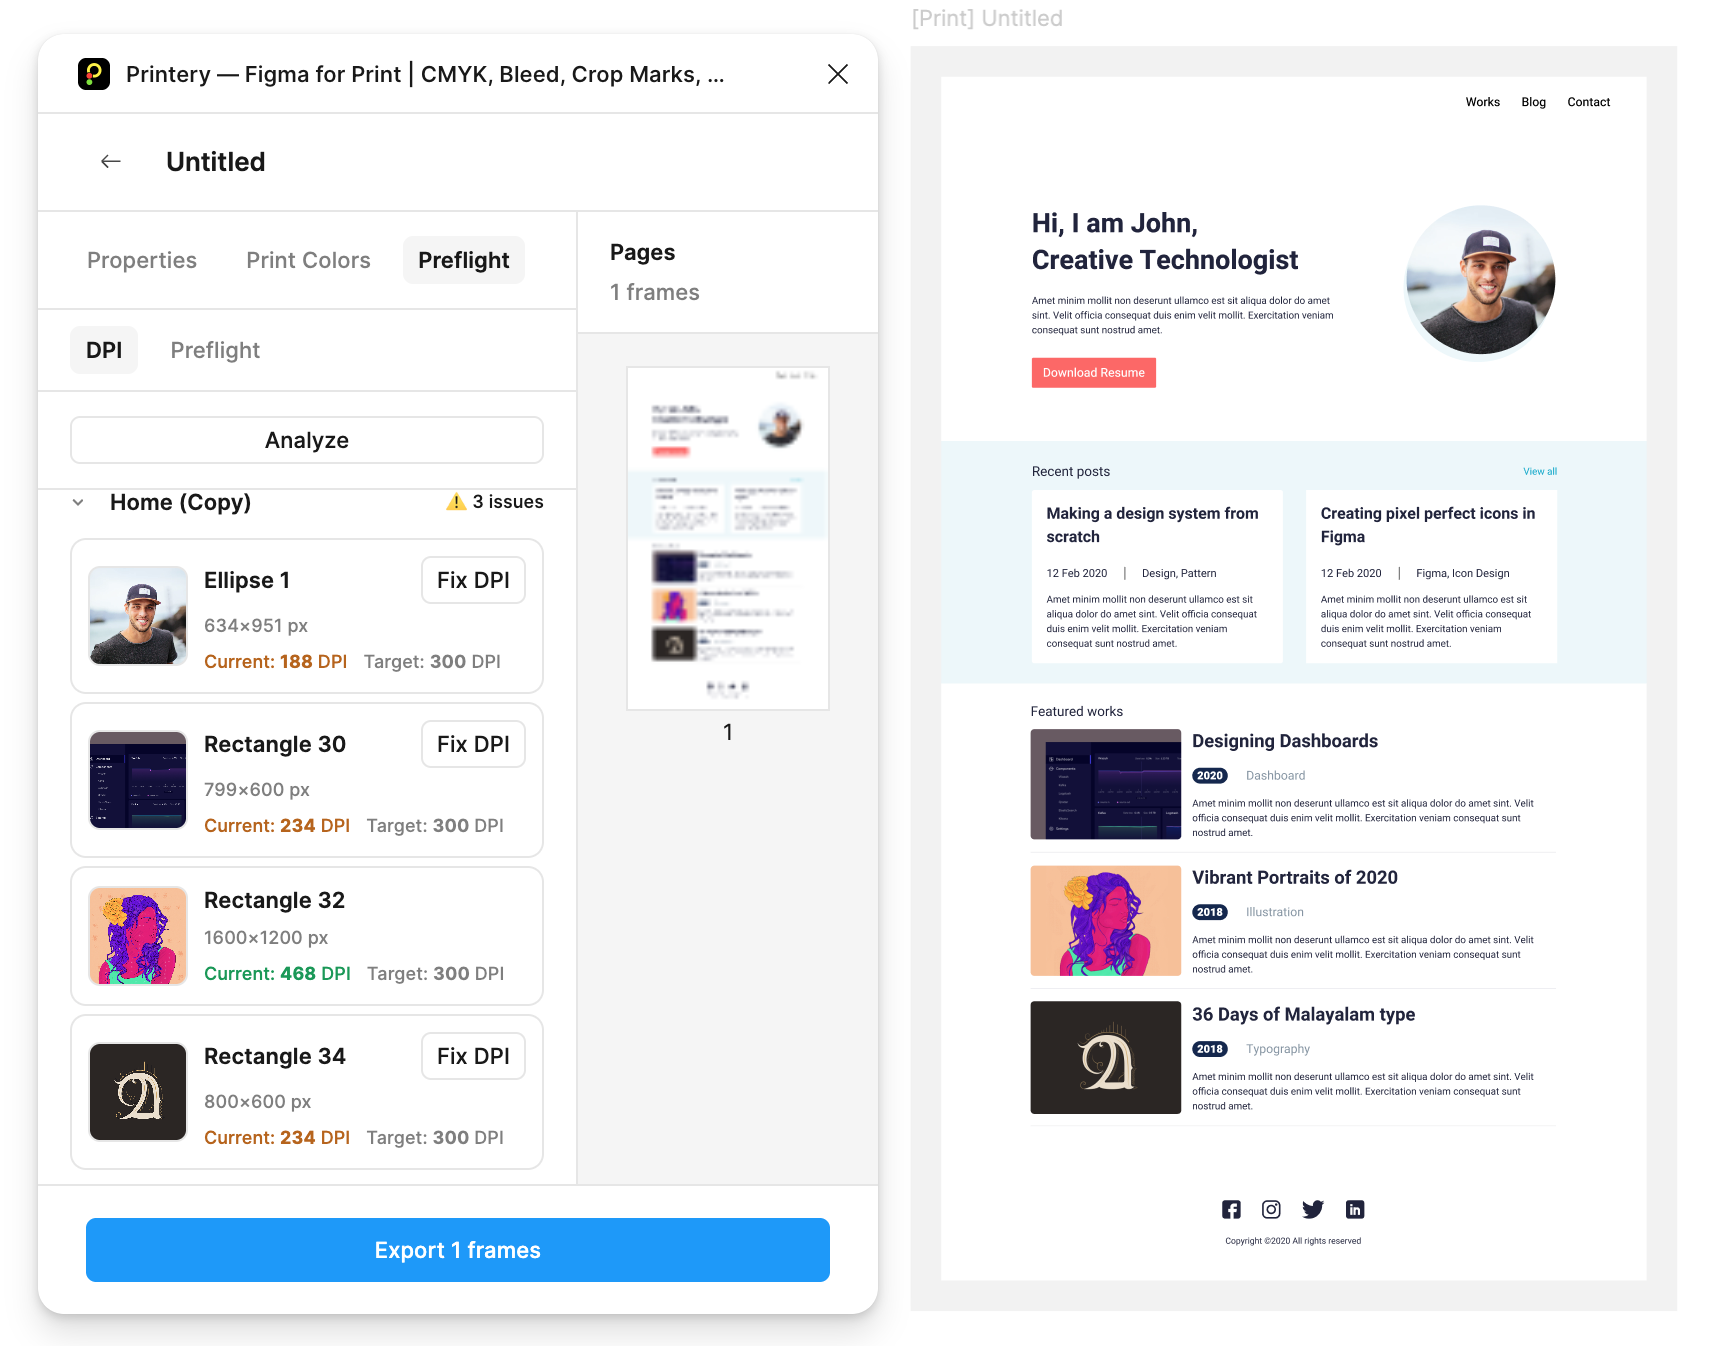
How Printery's DPI Check Works
Scans All Images
Printery scans every raster image in your selected frames, calculating the effective DPI at the current print size.
Flags Low-Res
Images below your target DPI (default 300) are highlighted with warnings showing their actual resolution.
Fix Before Export
Replace low-res images with higher-resolution versions, or resize them smaller to increase effective DPI.
DPI Quick Reference
| Print Size | Min. Image Size (300 DPI) | Common Use |
|---|---|---|
| 3.5" × 2" | 1050 × 600 px | Business Card |
| 5" × 7" | 1500 × 2100 px | Flyer / Postcard |
| 8.5" × 11" | 2550 × 3300 px | Letter / Brochure |
| 11" × 17" | 3300 × 5100 px | Tabloid / Poster |
| 24" × 36" | 7200 × 10800 px | Large Poster |
Formula: Print size (inches) × DPI = Required pixel dimensions
Never Print a Pixelated Image Again
Catch low-resolution images before they reach the printer. Printery's DPI check has your back.